 LoomArras
Getting started with LoomArras
This guide takes you from the receipt email to a working cast, then explains where LoomArras keeps your work and how to get files in and out of it. Keys are written for the Mac. On Windows and Linux, press Ctrl wherever you see ⌘.
1. Download it
After you buy LoomArras, the receipt email lists a download for each kind of computer. You only need one of them.
| Your computer | Download the file ending in |
|---|---|
| Mac with Apple silicon (M1 or later) | macOS-arm64.dmg |
| Mac with an Intel chip | macOS-x86_64.dmg |
| Windows 11 | windows-x64-setup.exe |
| Ubuntu, Linux Mint, Debian | linux-x86_64.deb |
| Fedora, openSUSE | linux-x86_64.rpm |
Not sure which Mac you have? Open the Apple menu and choose About This Mac. It says either "Chip: Apple M1" (or M2, M3 and so on) or "Processor: Intel".
The .zip files hold the same Mac app without the disk image, and the .msi is the same Windows app for PCs managed by an IT department. Most people can ignore both. Keep the receipt email: it's also how you download new versions later.
2. Install it
Mac
- Open the
.dmgand drag LoomArras onto the Applications folder beside it. - Open LoomArras from Applications, not from inside the disk image.
- macOS asks once whether to open an app downloaded from the Internet. Click Open. LoomArras is signed and notarized by Apple, so that's the only question.
If macOS says the app "can't be opened on this Mac", you have the file for the other chip. Download the other .dmg from your receipt.
Windows
- Run
LoomArras-1.0.0-windows-x64-setup.exe. It installs for your own account and doesn't need an administrator password. - The installer isn't signed by Microsoft yet, so Windows may show a blue box that says "Windows protected your PC". Click More info, then Run anyway.
- Open LoomArras from the Start menu.
Linux
Install the package from a terminal in your Downloads folder, so your system fetches anything else it needs:
sudo apt install ./LoomArras-1.0.0-linux-x86_64.deb     # Ubuntu, Mint, Debian
sudo dnf install ./LoomArras-1.0.0-linux-x86_64.rpm     # Fedora
Then open LoomArras from your applications menu.
There is no license key to type in and no account to make. LoomArras doesn't go online at all unless you click Check for updates.
3. Look round the demo novel
The first screen is Your projects. Before you make anything, click Load demo novel. It opens Wayside Folk, a family saga with 64 characters, and it's the quickest way to see what a full project looks like.
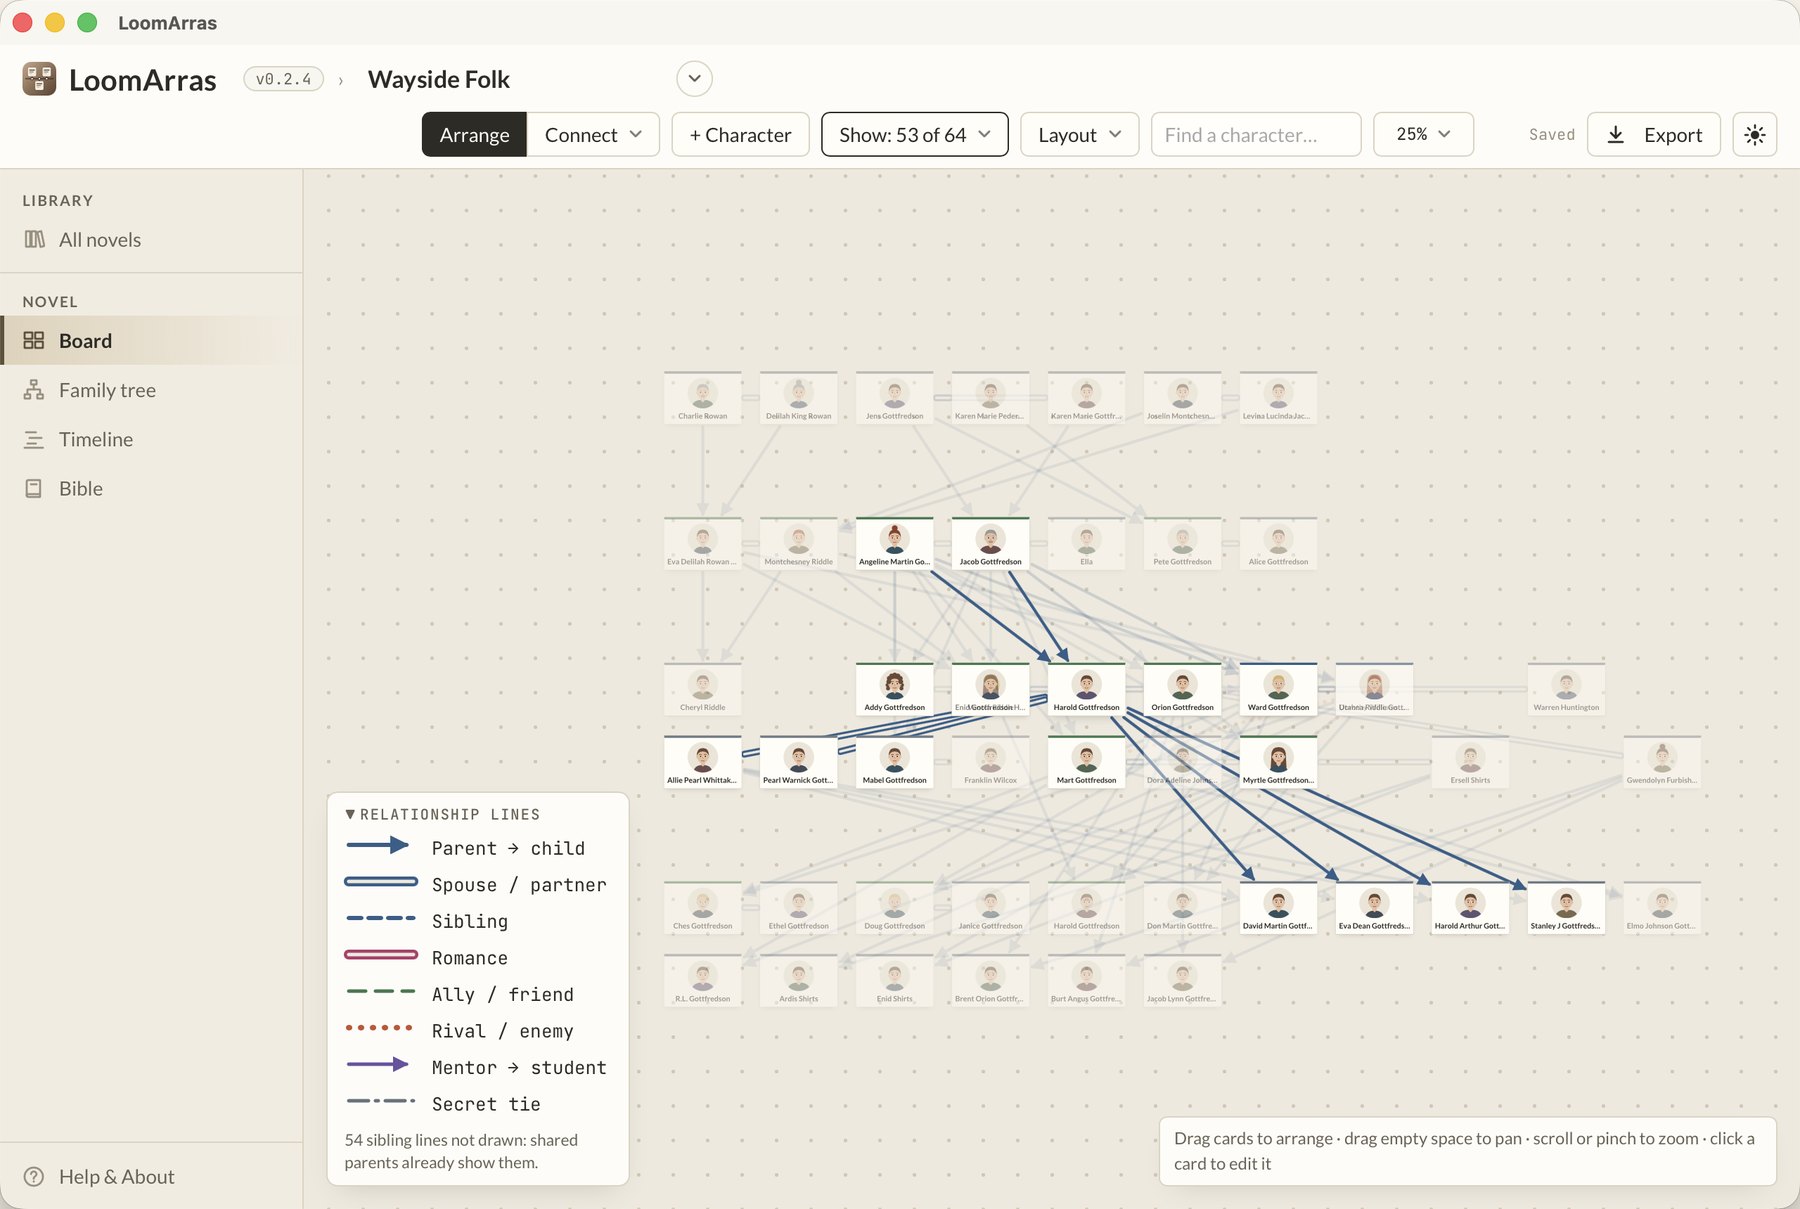
Things to try while you're there:
- Drag a card. Drag empty space to move the whole board, and scroll to zoom.
- Double-click a card to open it. Press Esc to close it without changing anything.
- Click Family tree and Timeline in the sidebar. Nobody drew those: they come from the cards.
- Press ⌘K and type
ward.
You can't break the demo. Change whatever you like, and use Undo (the curved arrow at the top right) if you want something back.
4. Start your own project
- Click All projects at the top of the sidebar, then New project.
- Give it a title and say what you're writing: a novel, a textbook, a screenplay, or one of the kinds under Other. This only changes the words LoomArras uses (chapters or scenes, for instance), and you can change it later.
- Under Start with, choose An empty board if you know your cast, or A genre cast for a set of ready-made parts (The Detective, The Mentor and so on) to rename.
If you already have a list of characters in a spreadsheet, or chapters written, read section 9 before you type anyone in by hand.
5. Add and edit characters
Open the Characters menu in the top bar and choose + New character, or press ⌘N. A card opens. Only the name is required. The rest is there for when you need it:
- Role, age, Born and Died. The dates put the character on the Timeline.
- Physical. Hair, build, glasses and the like. These also draw the small portrait on the card.
- Temperament, Wants and Fears. Where the character starts. The Arcs page tracks how these change.
- Secrets. What they're hiding, who else knows, and the chapter it comes out.
- Voice. How they talk: favourite phrases, words they'd never use, a few sample lines.
- Life events. Moves, marriages, anything with a year.
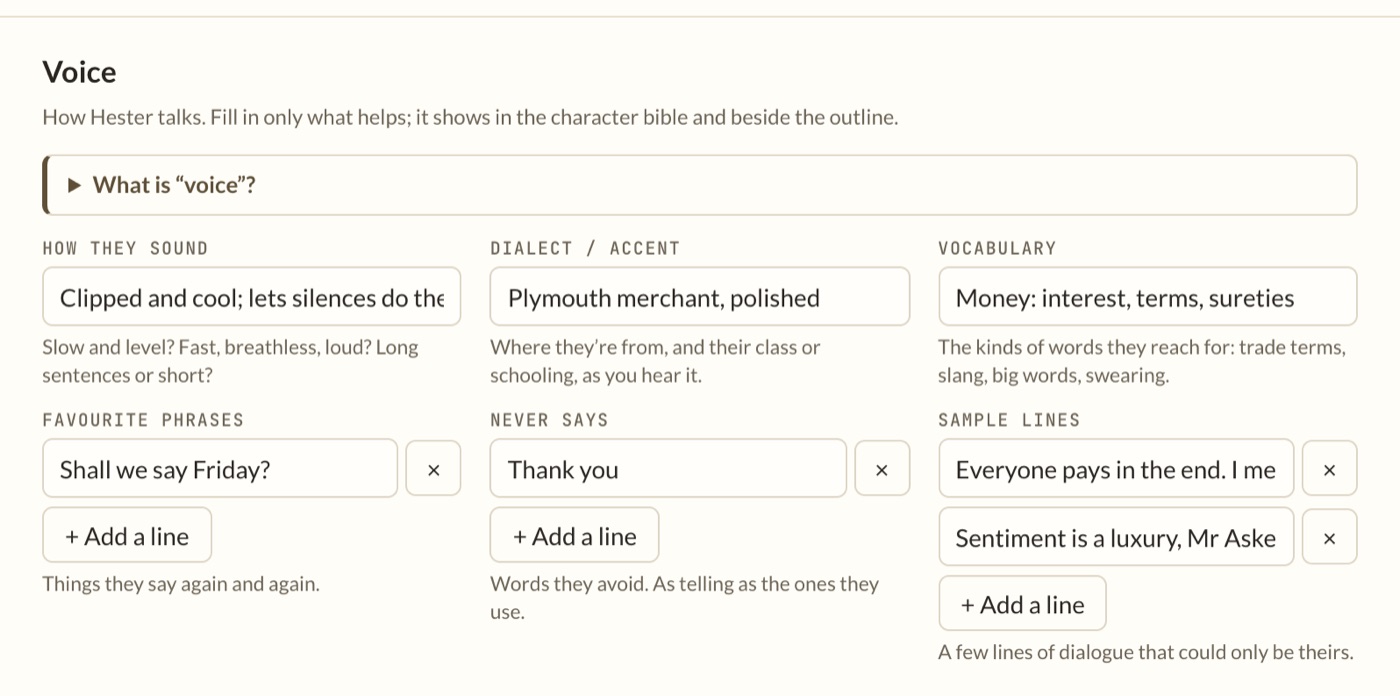
Click Save and the card appears on the board. To edit it later, double-click it. You can also open a card from any other page by clicking the character's name, so you rarely have to go back to the board just to fix a detail.
Don't try to fill in every box for every character. A minor character might only ever need a name and one line of notes.
6. Connect them
- On the board, find Connect in the tools column on the right.
- Click a kind of line, such as Parent → child or Spouse / partner.
- Click the first character, then the second. For a parent line, click the parent first.
- Keep going, or press Esc to stop drawing lines.
Click any line to change it, add a note, or say when it holds. A marriage can run from 1870 to 1885, and a rival can become an ally in chapter 12. More… under Connect has step-parents, half-siblings, adoptions and other variations, and you can add relationship types of your own.
When the board gets crowded, Layout will tidy it (try Family rows), and Show hides everyone except the people you want to look at. Hiding never deletes anyone.
7. What the other pages do
Every page reads the same cards. Change a birth year on a card and the Timeline, the Family tree and the character bible all change with it.
| Page | Use it to |
|---|---|
| Family tree | See parents, children and marriages drawn as a tree. Save it as a picture. |
| Appearances | See who is in which chapter, and who vanishes for too long. |
| Timeline | See every life against the years, with where each person lived. |
| Arcs | Record the chapters where a character's temperament, wants or fears change. |
| Beat sheet | Lay the whole story out in fifteen beats, each with a word target. |
| Outline | Plan chapter by chapter, as text or as a grid of plot lines. |
| Manuscript | Read your chapter files to find where each character appears. |
| Character bible | Read the whole cast as one document, and export it. |
| Index cards | Print a 5 × 3 inch card for each character. |
8. Plan the story
The Outline page is a plain text box with a handful of marks. You type something like this:
# 1. The Drowned Ledger
When: March 1789
## Osric's body on the shingle +osric?
- @Maren finds @Osric at low tide
- His hands are ink-stained; the parish ledger is missing

# 2. Salt and Ink
## Rook at the customs house +ledger? +osric
- @Rook claims the ledger was smuggled cargo| Mark | Meaning |
|---|---|
# | A chapter. Put its number first. |
## | An event: a scene, or something that happens. |
- | A detail of that event. |
@Name | A character from your cards. Type @ and the first letters, and LoomArras offers the names. |
+tag | A plot line (LoomArras calls it a thread). Make the tag up and reuse it wherever that plot line moves on. |
? ~ ! | After a tag: this event opens the question, twists it, or answers it. |
> | A note to yourself. |
As you type, the panel beside the editor shows who is in the current chapter, how each of them talks, and anything that doesn't add up, such as a plot line you opened and never closed.
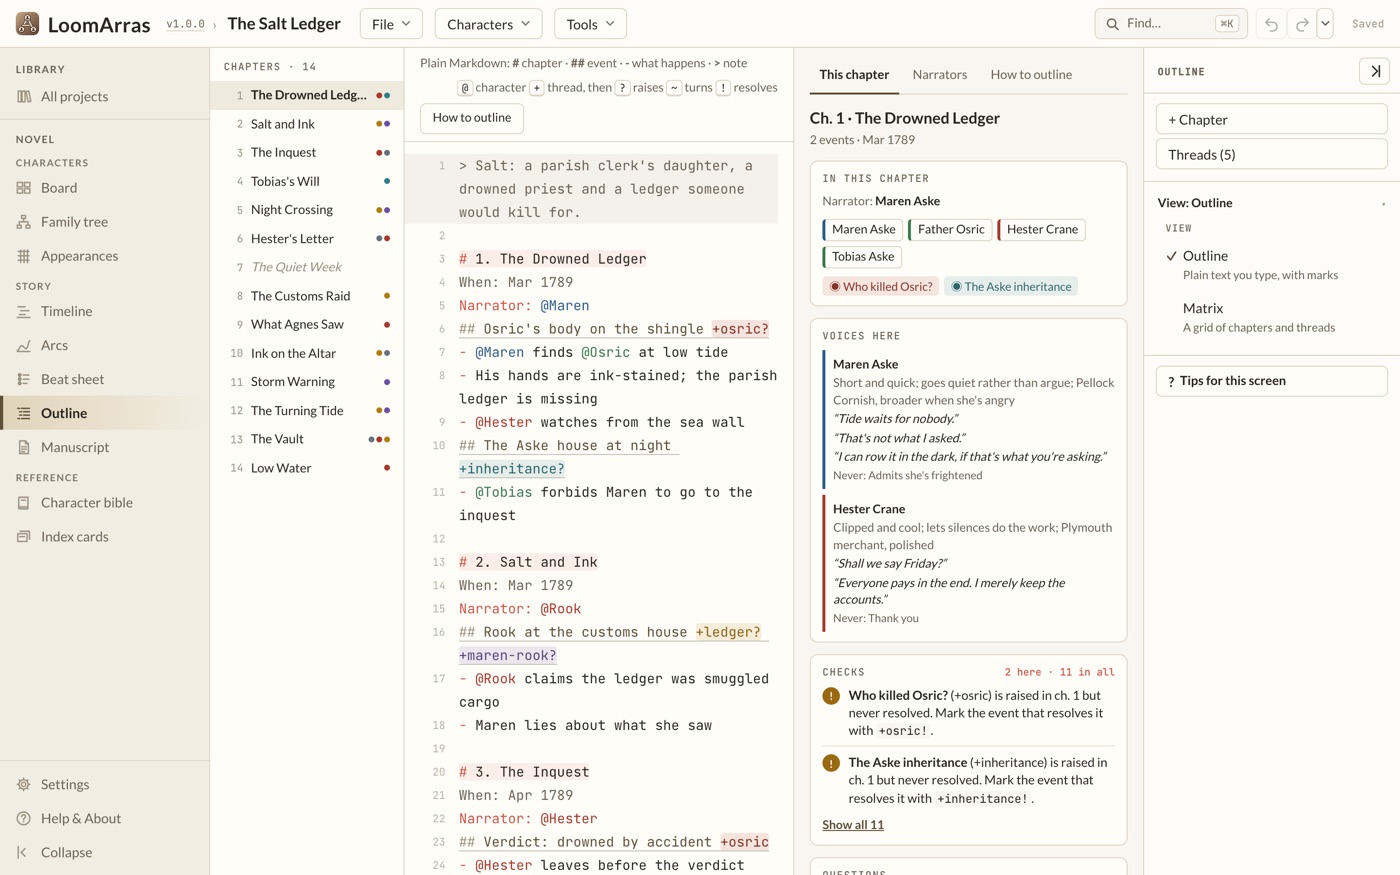
If you'd rather click than type, switch View to Matrix. It shows the same outline as a grid, with a row for each chapter and a column for each plot line. What you add in one view appears in the other.
On an empty outline, Open the example loads a finished one to study. The How to outline tab beside the editor keeps the marks in view while you work.
9. Bring in what you've already written
A list of characters
Choose Characters › Import a cast… and pick a spreadsheet saved as CSV (Excel, Numbers and Google Sheets can all save one). Use one row for each character, with the column names in the first row:
Name,Role,Born,Occupation,Notes
Maren Aske,Protagonist,1762,Parish clerk's daughter,Rows better than any man on the quay
Silas Penhallow,Supporting,1741,Coroner's man,Writes everything down
The columns can be in any order. A column LoomArras doesn't recognise goes into each card's Notes, so nothing is dropped. You see a preview of every row before anything is added, and a character who is already on the board only has their empty boxes filled in.
Chapters
Open Tools › Scan the manuscript… and choose your chapter files (.docx, .md or .txt). LoomArras counts where each character is mentioned, fills in the chapter each one first appears, and lists the names it found that have no card yet. Tick the ones you want and press Apply.
The scan only reads your chapters. It never changes them and nothing leaves your computer. To start a brand-new project from a manuscript, use Import a manuscript… on the Your projects screen.
10. Your files: saving, backups and moving computers
You don't have to save. Every change is written to disk as you make it, and Saved at the top right confirms it. LoomArras also keeps a backup copy every ten minutes or so while you work, and holds on to the last twenty.
Where your work is
Each project is one file in a LoomArras folder on your computer. The foot of the Your projects screen shows the exact place. Normally it is:
| Mac | ~/Library/Application Support/LoomArras/ |
| Windows | %APPDATA%\LoomArras\ |
| Linux | ~/.local/share/loomarras/ |
Inside it, novels holds your projects and backups holds the copies. If you back up your computer with Time Machine or something like it, this folder is included. You don't normally need to open it.
Keeping a copy you can go back to
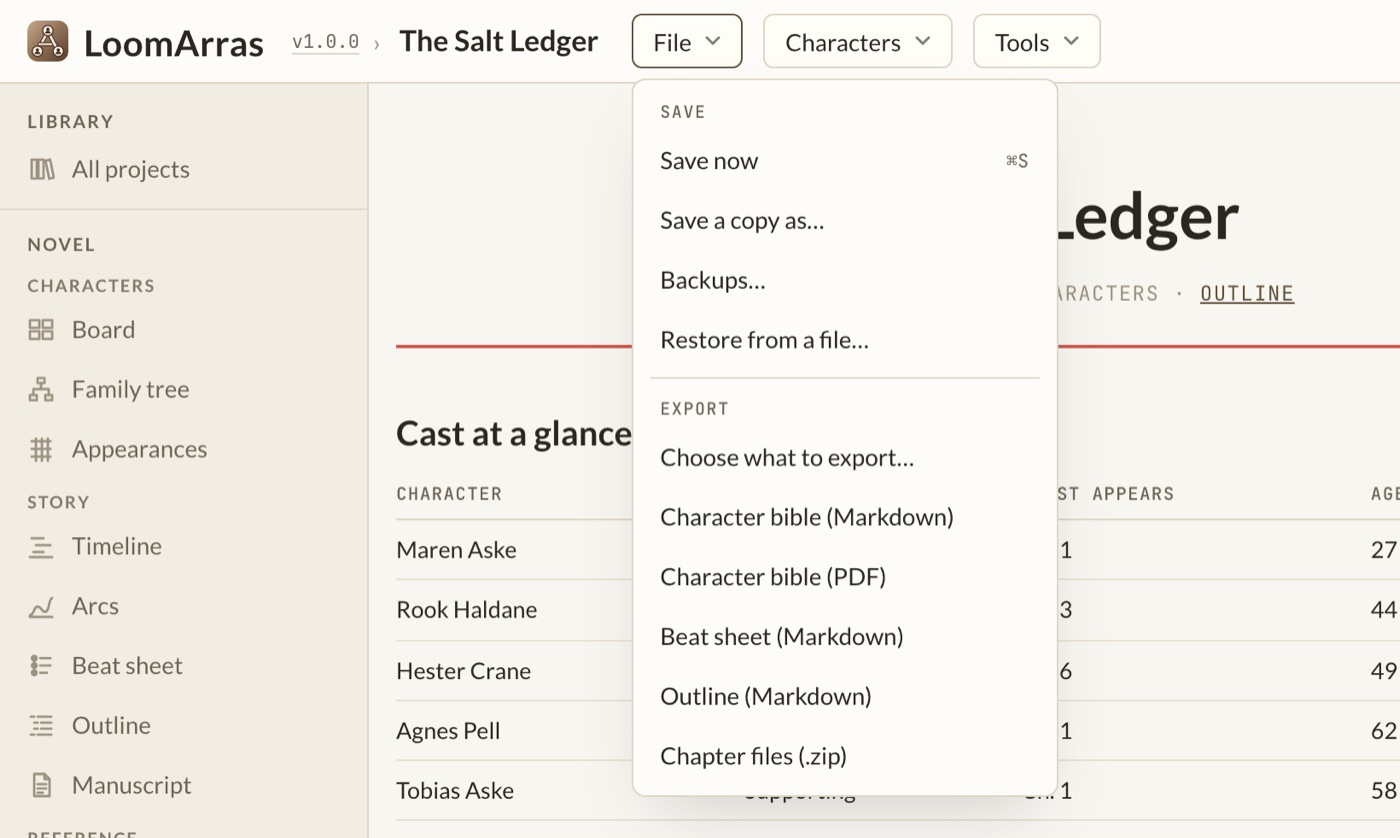
Open the File menu in the top bar:
- Save now (⌘S) keeps a copy of the project as it stands, for instance before you cut a subplot.
- Backups… lists every copy. You can compare one with the project today, then bring back the whole project or just one character's card.
- Save a copy as… writes the project to a single
.jsonfile wherever you choose: a USB stick, a cloud folder, an email to yourself. - Restore from a file… loads one of those files back into the project.
Moving a project to another computer
- On the first computer, open the project and choose File › Save a copy as….
- Get that
.jsonfile to the second computer. - There, on the Your projects screen, click Open a backup file… and choose it.
The two computers don't stay in step afterwards. LoomArras has no sync, so decide which copy is the current one and carry it across the same way when you switch.
When something goes wrong
- You changed or deleted something by mistake. Press ⌘Z, or click the curved arrow at the top right. The small arrow beside it lists the last 50 changes, and the list is still there after you quit.
- You deleted a whole project. It waits under Recently deleted on the Your projects screen until you restore it.
- A project won't open. If its file was damaged, by a full disk for example, the project is listed under Can't be opened with a button to restore it from a backup.
11. Files you can take out and edit
Everything under Export in the File menu makes an ordinary file that opens in other programs.
| Export | What you get |
|---|---|
| Character bible (PDF) | The whole cast, laid out to read or print. LoomArras makes the PDF itself. |
| Character bible (Markdown) | The same as text, to edit in any editor or paste into your notes. |
| Beat sheet (Markdown) | The beat sheet as a text file. |
| Outline (Markdown) | The outline exactly as you typed it. |
| Chapter files (.zip) | One empty Markdown file per chapter to write in, each starting with its part of the outline as a hidden note. |
| Choose what to export… | Pick the characters and sections yourself, add the family tree and timeline as pictures, or lay the cast out as index cards. |
The Family tree page has its own Print & save, which saves the tree as an SVG or PNG picture.
Editing files outside LoomArras
Most exports are one-way. If you edit the exported bible in Word, LoomArras doesn't know, and the next export will overwrite your changes with what the cards say. Change the cards instead and export again.
Two things do go both ways:
- The beat sheet. On the Beat sheet page, Markdown file saves it and loads it back, so you can work on it in a text editor and bring the result home.
- The outline. It's plain text, so you can copy it out, edit it anywhere, and paste it back into the Outline page.
The chapter files are meant for your real writing. Unzip them into your manuscript folder and write each chapter under its note. If you track your word count with WordCairn, it leaves those notes out of the count.
The project file itself is plain text too (JSON), and you're welcome to read it. We'd advise against editing it by hand. If you do, quit LoomArras first and keep a copy.
12. Keys worth learning
| ⌘K | Find a character, go to a page, or do almost anything by typing its name |
| ⌘N | New character |
| ⌘J | Jot a quick note about a character, to sort out later |
| ⌘Z | Undo |
| ⌘S | Save now: keep a copy to go back to |
| ⌘\ | Fold the tools column away, or bring it back |
| ⌘/ | The full list of keys |
13. Updates and help
LoomArras never checks for updates by itself. Click the version number beside the name at the top left, then Check for updates. If there's a newer version, download it from the link in your receipt email and install it over the old one. Your projects stay where they are. Every update is included in what you paid.
Help & About, at the bottom of the sidebar, explains every page in more detail than this guide does, and its Outlining tab has a longer walk through the outline.
If something doesn't work, or you wish LoomArras did something it doesn't, write to [email protected] or use Send feedback in Help & About. Tell us what kind of computer you have and what you were doing. We read every message.